The leader in field service, inspections and property management.
860-761-0001
After you've completed an order, you will want to invoice the order to your client, and record your client's payments. In this section we will take you through the process of creating an invoice for an order, sending that invoice to your client, and recording the client's payment.
The procedure for invoicing varies between inspection and preservation orders. Preservation orders take a "one-at-a-time" approach to invoicing, while the inspections invoicing system is designed to quickly invoice a huge batch of orders at once. For this reason, the steps to create the invoice are separated below.
To start invoicing a preservation order, open the order, and switch to the "Invoice" tab. Click in the "New Invoice" button in the toolbar. At this point, if you haven't yet marked the order as "Work Completed", it will ask you if you want to do so.
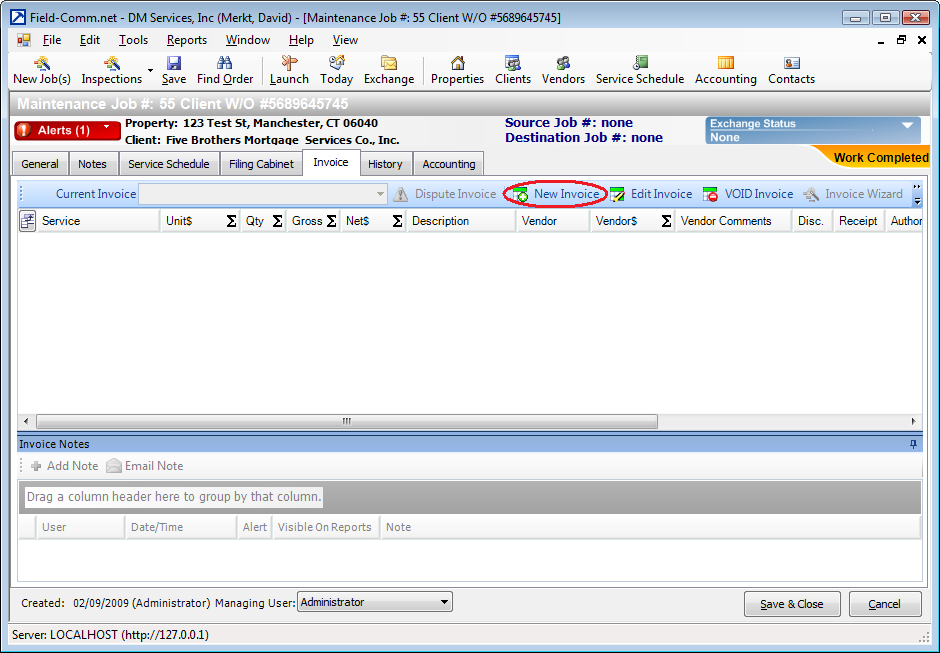
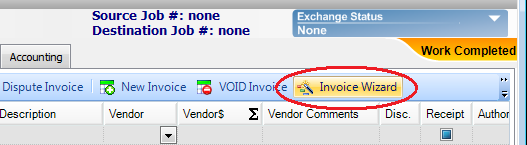
At this point you are able to manually build the invoice line by line, by selecting an item from the "Service" column dropdown. However, the easier, quicker, and more accurate method is to create the invoice by using the "Invoice Wizard" button located in the taskbar.
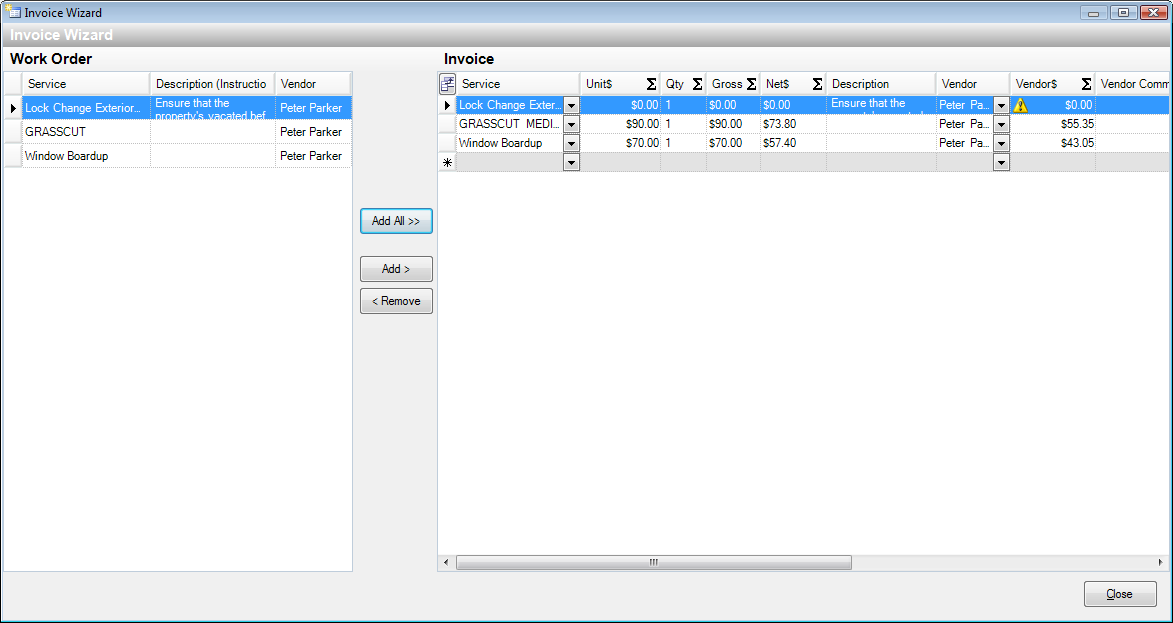
Clicking on "Invoice Wizard" will open the "Invoice Wizard" screen. On the left hand size of the window is a list of all of the services that were requested in the work order. On the right hand side of the window is a (currently empty) grid where services that will show up on the invoice will be placed. The "Add All" button will add every single service in the left-hand pane to the invoice that you're creating. The "Add" button will add just the services that you've highlighted in the left-hand pane to the invoice that you're creating. The "Remove" button will remove any services in the right-hand pane that you've highlighted. "Close" will save the changes to the invoice, and close the wizard.
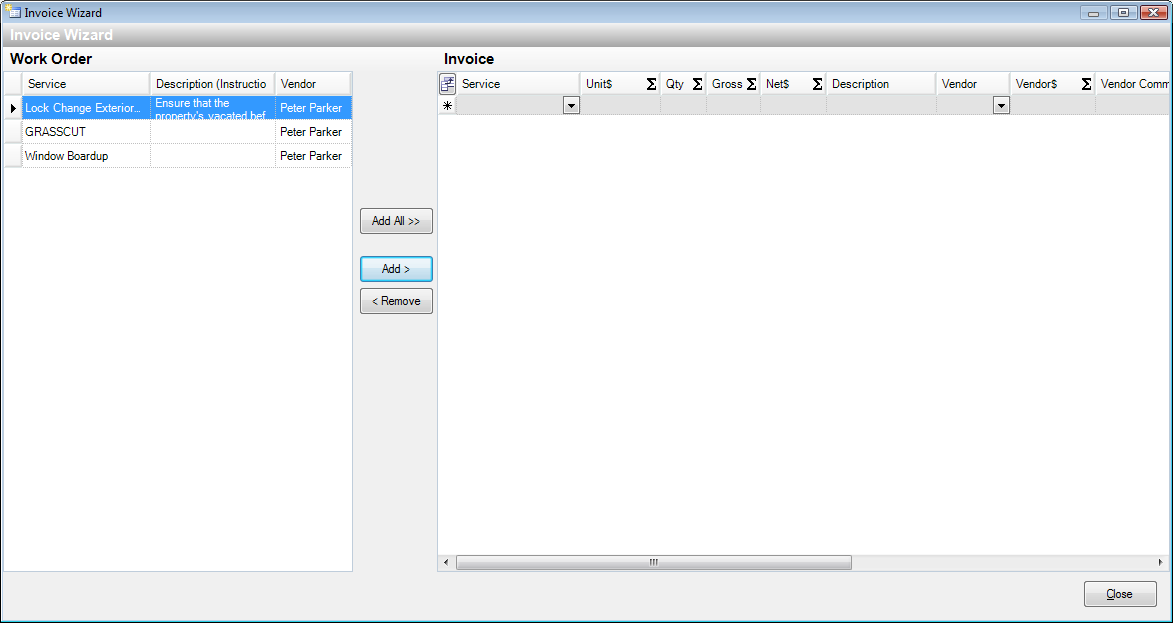
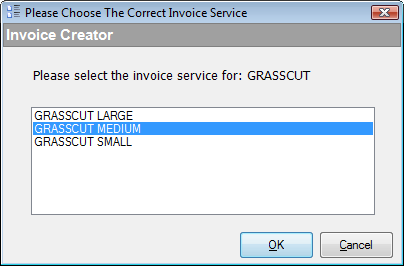
In most cases you will want to click on the "Add All" button to add all of the services to the invoice at once. If you have a grouped service, you will be prompted to choose which of the services in the group you are adding. Make your selection and click "OK".
If all of the services that you added to the invoice are in your services table, and all of the pricing information has been entered for those services in the pricing table, then the pricing will autocomplete, as can be seen with the Grasscut and Boardup services in the example below. However, if you received an order from Field-Exchange and hadn't switched the service from being of type "Misc", or if the pricing isn't configured, the price won't automatically fill in. In this case, you can click in the "Unit" field of that service and manually change the amount from 0.00 to the correct amount. You may also correct the pricing for any service whose pricing came in automatically, but which you want to charge differently for as a one-time exception. Editing the "Qty" cell will automatically recalculate the price. You may also edit the text under "Description", or add text in the case that there's none there to begin with. You can add additional services by clicking on the "Service" dropdown on last row (the greyed out, empty row). When finished, click the "Close" button.
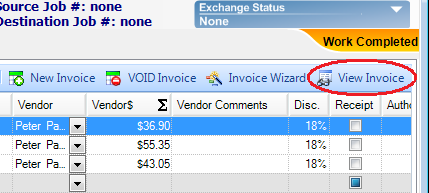
You will then be brought back to the "Invoice" tab of the order screen. From here you can see all of the invoice items that you added in the wizard. To send the invoice to your client, and post it to the accounting section of Field-Comm, you will click on the "View Invoice" button in the toolbar.
The invoice will now open up. You will want to first save the invoice to the filing cabinet as a PDF, so you can reference it at a later date. This way, even if you modify the invoice at a later date, you will have the PDF copy in the filing cabinet for reference. Click the "Save To Filing Cabinet As PDF" button in the toolbar.

Next, you need to decide if you want to send the invoice to your client at this time or not. If you don't want to send the invoice yet, click the "Close" button. If you do want to send the invoice, and you received the order though Exchange and want to send the invoice back through Exchange, click the "Post Invoice" button. Otherwise, if you want to send either by email or by printing, click the "Email as PDF" button or "Print" button, then click "Post Invoice".
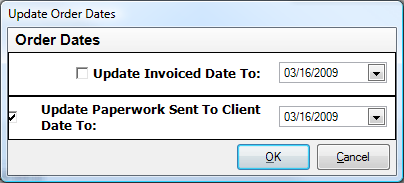
After clicking "Post Invoice" you will see a window prompting you to update the "Paperwork Sent To Client" date. Choose the date that you want to use and click on "OK". This step changes the job's status from "Work Completed" to "Invoiced".
The order is now invoiced. You can click the "Close" button in the bottom right side of the Invoice screen to close the screen.