The leader in field service, inspections and property management.
860-761-0001
Anyone who works in the default mortgage industry knows how complicated it is to invoice clients for work that has been performed. Each of your customers has its own discount that it applies to your services, and each has its own pricing. Even worse, sometimes they vary their discounts or pricing based on the area where the property is located, the loan type, and even the bank that made the loan. Trying to keep track of this information and invoice correctly using a manual method can easily become a huge chore, but with Field-Comm’s regions setup all of these differences are resolved automatically. Once you set up your pricing and discount regions inside of Field-Comm, the software will automatically apply the correct pricing and discount for services based on the zip code where the property is located, the loan type, the client, and the bank.
To set up this automation, we must first plan out our regions. When setting up the regions, we are concerned with only how differences in property location affect the pricing and discount of a service. At this point the affect that loan type, bank, or other items might have on pricing is ignored. We need to plan out the specific region of zip codes that affect our pricing and discount.
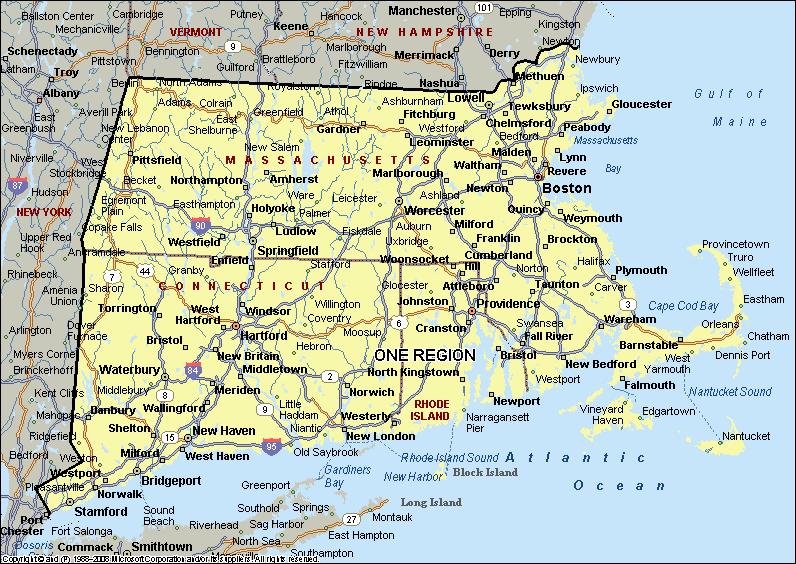
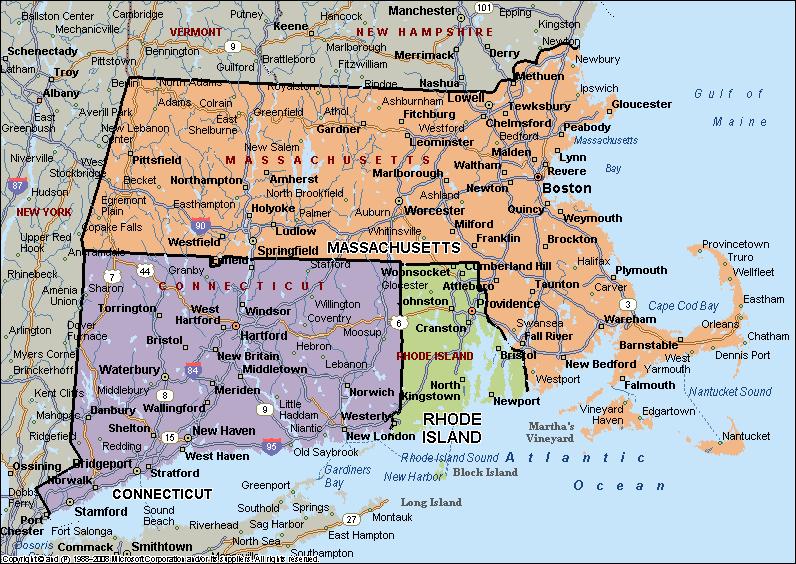
The easiest setup situation is if the pricing or discount doesn’t change at all based on the property’s location. Suppose that we are working for Bank of America and LPS in three different states: in Connecticut, Massachusetts, and in Rhode Island. Our agreements state that for preservation orders the discount and pricing is going to be the same for services performed at any property in any of those states, regardless of the location. In this case we could make one region for both pricing and discount regions, which will include all of the zip codes across the three states that we cover.
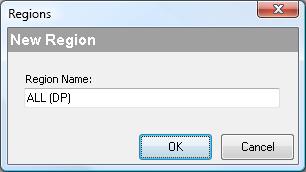
We are going to name this single region "ALL (DP)". We can break down the naming convention like this: "ALL" is a description of what the region covers, in this case everything. DP signifies that this region will cover both discount and pricing regions.
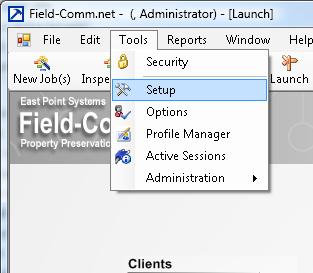
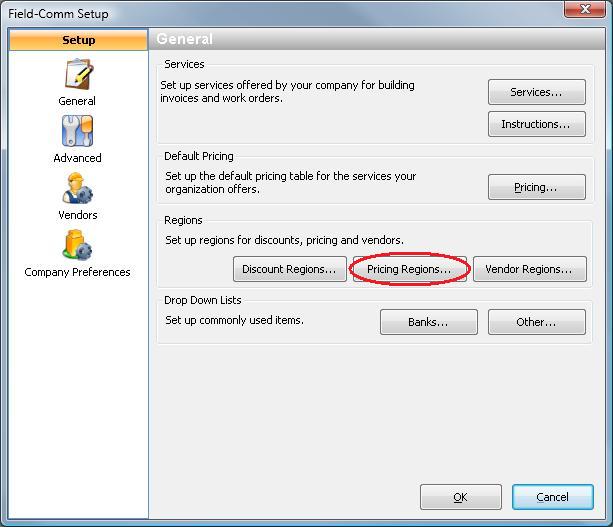
We set up the regions by clicking on Tools > Setup
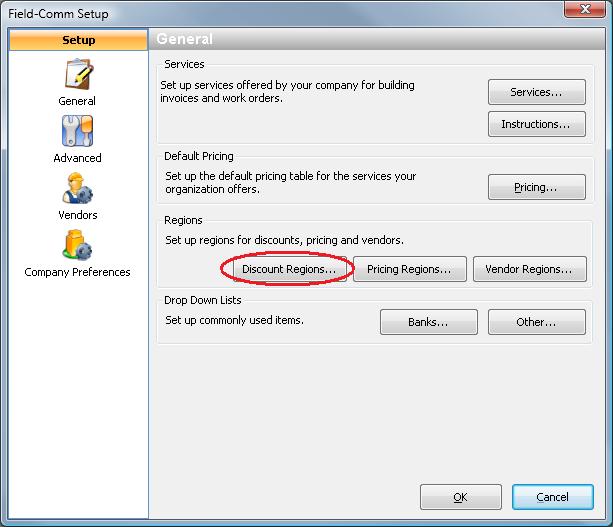
We will then click on the "Discount Regions" button to configure the discount regions
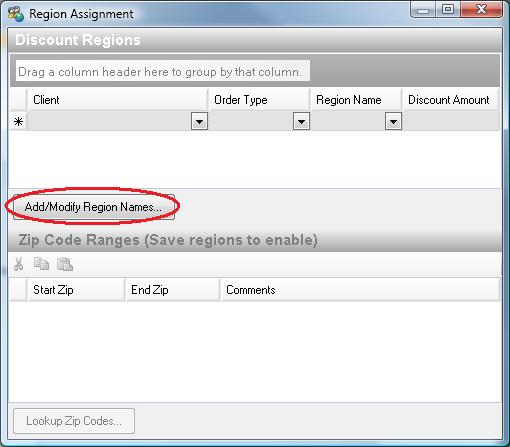
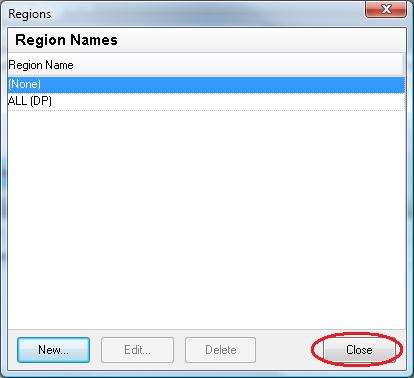
Click on the "Add/Modify Region Names" button to begin
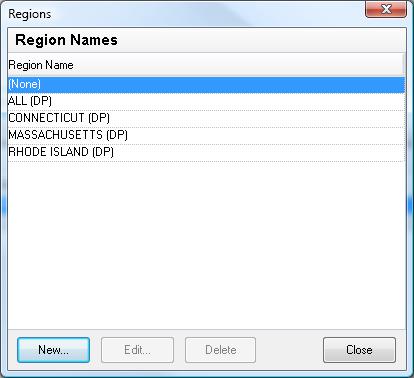
In the Region Names window, click on "New" to begin creating a new region

We will then type in the name of the region that we are creating [ALL (DP)], and then click on OK
Finally, click the "Close" button to return to the Discount Region screen
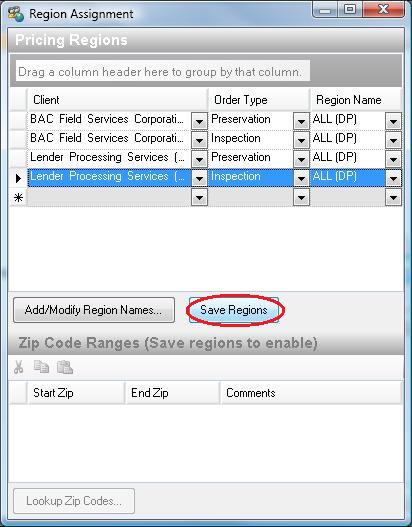
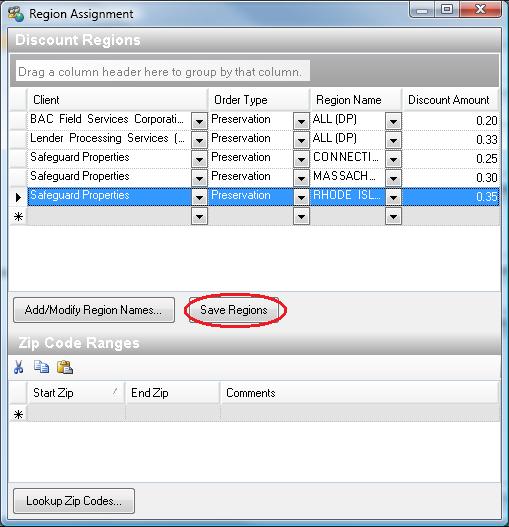
Now we are back at the "Discount Regions" screen. We will choose our clients from the dropdown, populate the order type, and fill in the discount for them. When finished, click the "Save Regions" button.
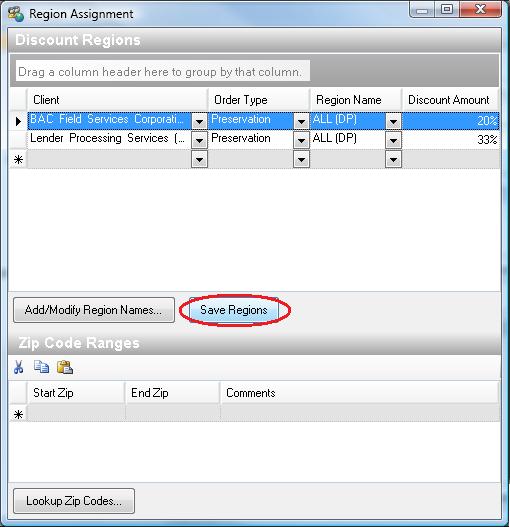
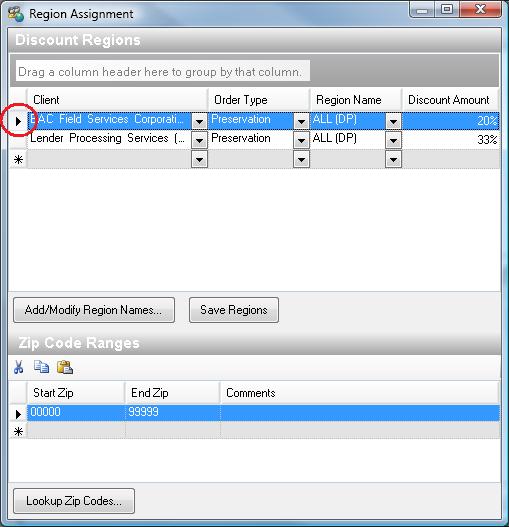
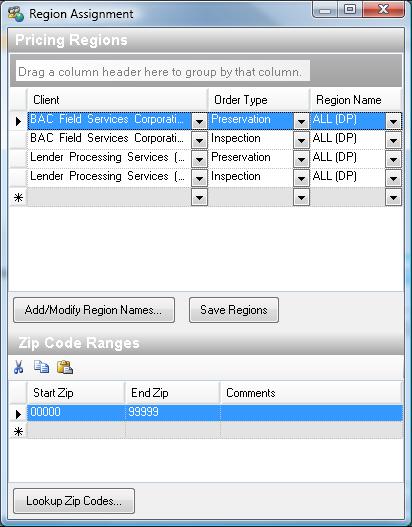
We now need to assign zip codes to each client’s region. We’re using the example that the discount is going to remain the same for each client, regardless of the zip code, so we’re going to enter in a zip code range of 00000 to 99999. Highlight each row in turn by clicking on the leftmost column (circled in the picture to highlight correct location) and then fill in the start and end zip cells. You need to do this for both of the clients. Note that both BAC and LPS have the same zip code range (00000-99999).

Each time you switch from one client to another you will be prompted to save the changes. Click "Yes" each time.

When you’re finished, close the window by clicking the red "X" at the top of the screen.
We will now adjust the pricing regions in exactly the same way. First, click on the "Pricing Regions" button
Because we have already created the ALL (DP) region, we don’t need to go to the "Add/Modify Region Names" button and create it again. Instead, we can choose our client, order type, and the "ALL (DP)" regions from the dropdowns. If you are performing inspections for a client, remember to make a region settings for both for inspections and for preservation. When you’re finished, click the "Save Regions" button.
We now need to assign zip codes to each of the regions. Like we did before, we need to give each individual row the zip code range of 00000 to 99999.
When that has been finished, click the red "X" at the top of the screen to close the window.

If your pricing and discount don’t vary based on zip code, the "ALL (DP)" region is by far the easiest to set up. However, suppose you have a client who assigns a different discount based on the zip code? Maybe you change the price that you charge for a service based on the zip code. In this case we need to build separate regions.
Let’s pretend that we’re working for Safeguard, and we have a different discount in each of the three states that we cover. We also have a different pricing agreement for each of those regions.
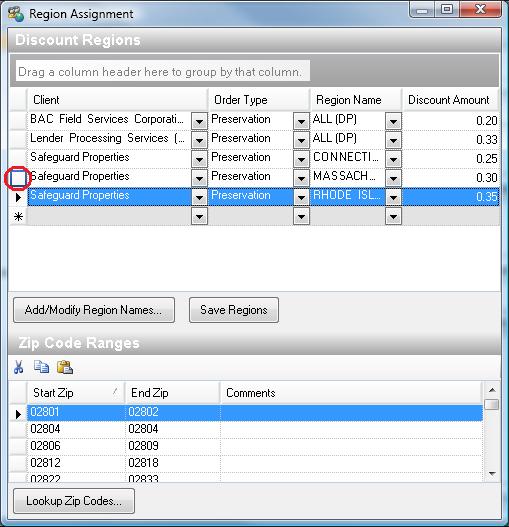
We are going to need to create a unique region name for each of those regions. Because this will cover both pricing and discount again, we’re going to follow the region names with "(DP)". So we will create three regions: "CONNECTICUT (DP)", "MASSACHUSETTS (DP)", and "RHODE ISLAND (DP)". First, enter the "Discount Regions" setup page, and add those additional regions.
We then need to assign each of those regions to Safeguard, and click the "Save" button.
Next, we need to configure the zip codes for these regions. Previously, when dealing with "ALL (DP)" we had entered in 00000-99999 for our zip code range. This time, because this region is for a specific state, we need to look up the zip code range. First, we will click on the leftmost column (circled) to highlight one of the rows, and then click the "Lookup Zip Codes" button.
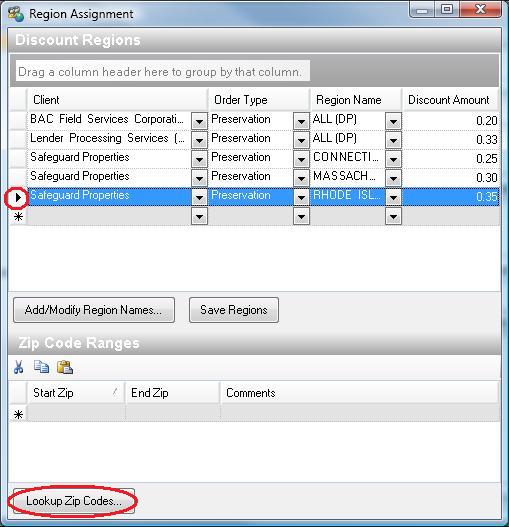
The "Lookup Zip Codes" window will then open up. Choose the state that you’re going to be searching for, in this case RI (Rhode Island), and then click "Search".
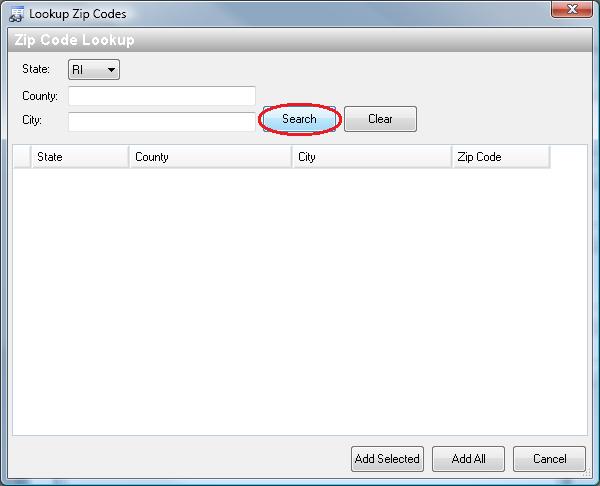
It will pull up a list of the zip codes in that state. Click the "Add All" button to bring them all into the regions page.

Click the next row, in this case the one for Massachusetts.
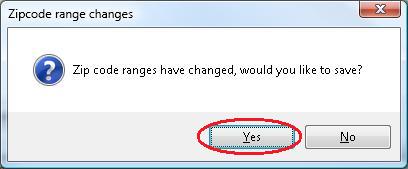
You will be asked if you want to save the changes, click "Yes"
Now click on "Lookup Zip Codes" again, and search for all zip codes in Massachusetts, adding them all. Repeat this with the final region as well.
When you’re finished, click the red "X" at the top of the screen to close.

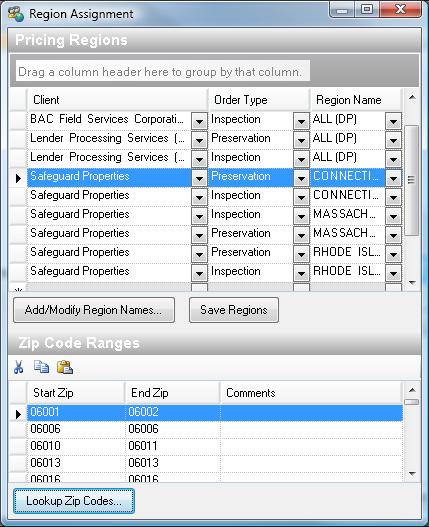
Since the pricing is also going to change by state, we next need to go to the Pricing Region setup, and configure the pricing regions for Safeguard. As before, we would choose their name from the client list, choose the order type, and choose the region. You should also remember to made rows for both the preservation and inspection order types if you do both. When you are finished filling the rows, click the "Save Regions" button, and then click the "Lookup Zip Codes" button to add the zip codes to each region.
You can mix the regions up as well. If you have a client who charges the same discount across all three states, but has different pricing in each, then you could use "ALL (DP)" for the discount region, and use each of the state regions in the pricing region setup screen. If you have a client who has different pricing across two different parts of a state, you would create a new region for each parts of the state., and when using the zip code search you can refine what zip codes are pulled up by choosing a county from the dropdown or searching for a specific city.